일렉트론을 처음 시작하시는 분은 다음의 링크를 참조해주세요 : iamdaeyun.tistory.com/entry/Nodejs-%EC%9D%BC%EB%A0%89%ED%8A%B8%EB%A1%A0electron-%EC%8B%9C%EC%9E%91%ED%95%98%EA%B8%B0
Node.js 일렉트론(electron) 시작하기
✔ node.js가 설치가 되어 있어야합니다. ✔ window10 환경입니다. ✔ "크로스 플랫폼 데스크톱 애플리케이션" 책으로 공부하며 그 내용을 정리하는 중입니다. 설치 방법 npm install -g electron -> 명령프
iamdaeyun.tistory.com
✔ node.js가 설치가 되어 있어야합니다.
✔ window10 환경입니다.
✔ "크로스 플랫폼 데스크톱 애플리케이션" 책으로 공부하며 그 내용을 정리하는 중입니다.
일렉트론(electron) 파일탐색기 만들기 - 첫번째 시간
사용자 폴더의 파일과 폴더를 읽어들이는 것 까지 해보겠습니다.
폴더명은 lorikeet-electron 으로 만듭니다.
mkdir lorikeet-electron && cd lorikeet-electron
npm init -y
👉 npm init 뒤에 붙은 "-y" 옵션은 " Generate it without having it ask any questions "이라는 의미입니다.
npm init만 하게되면 설정값을 넣어줘야 되는데, 가볍게 만드는 토이 프로젝트같은 경우 스킵skep 할때가 많죠. 그럴때 -y 옵션값은 유용합니다.
참조 : docs.npmjs.com/cli/v6/commands/npm-init
npm-init | npm Docs
create a package.json file
docs.npmjs.com
package.json
{
  "name": "lorikeet",
  "version": "1.0.0",
  "main": "main.js",
  "dependencies": {
    "async": "^3.2.0",
    "osenv": "^0.1.5"
  }
}
app.js
'use strict'

const fs = require('fs');
const osenv = require('osenv');

function getUsersHomeFolder() {
  return osenv.home();
}

function getFilesInFolder(folderPath, cb){
  fs.readdir(folderPath, cb);
}


function main() {
  let folderPath = getUsersHomeFolder();
  getFilesInFolder(folderPath, (err, files) => {
    if (err) {
      return alert('Sorry, we could not load your home folder');
    }
    files.forEach((file) => {
      //console.log(`${folderPath}/${file}`);
      document.write(`${folderPath}/${file}<br>`);
    });
  });
}

main();
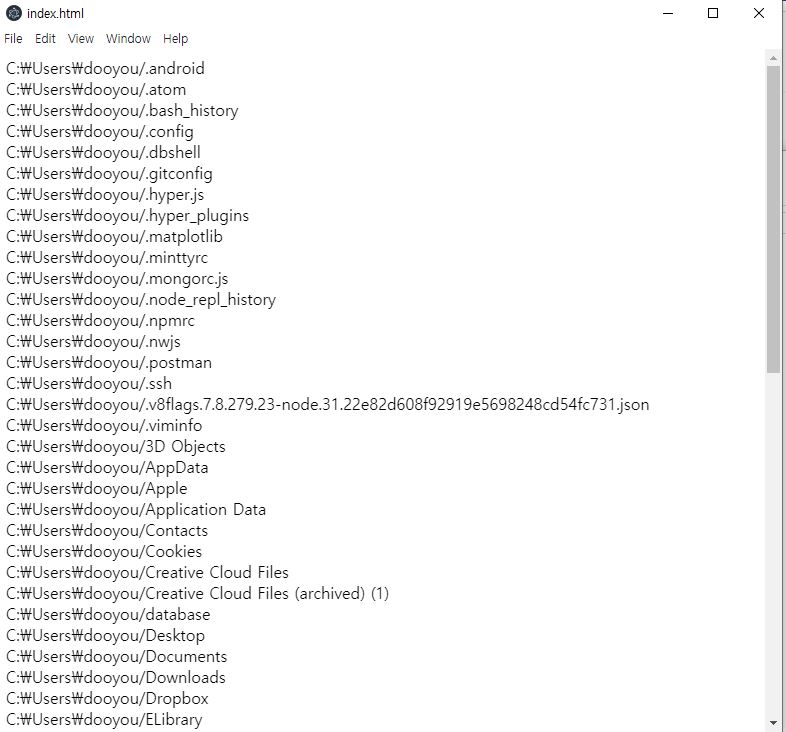
콘솔로 찍어도 되겠구요, 저는 document.write로 바로 보이게 일단 찍어봤습니다.
main.js
'use strict';

const electron = require('electron');
const app = electron.app;
const BrowserWindow = electron.BrowserWindow;

let mainWindow = null;

app.on('window-all-closed',() => {
  if (process.platform !== 'darwin') app.quit();
});

app.on('ready', () => {
  // Extra configuration settings added due to issue, see
  // https://github.com/paulbjensen/cross-platform-desktop-applications/issues/9
  mainWindow = new BrowserWindow({ webPreferences: { nodeIntegration: true } });
  mainWindow.loadURL(`file://${app.getAppPath()}/index.html`);
  mainWindow.on('closed', () => { mainWindow = null; });
});
index.html
<html>
  <head>
    <title>Lorikeet</title>
    <link rel="stylesheet" href="app.css" />
    <script src="app.js" ></script>
  </head>
  <body>
    <!-- <h1>Welcome to Lorikeet</h1> -->
    <div id="toolbar">
      <div id="current-folder">
        <script type="text/javascript">
          document.write(getUsersHomeFolder());
        </script>
      </div>
    </div>
  </body>
</html>
app.css
body {
     padding: 0;
     margin: 0;
     font-family: 'Helvetica','Arial','sans';
}

#toolbar {
     top: 0px;
     position: fixed;
     background: rgba(15%,15%,15%,0.5);
     width: 100%;
     z-index: 2;
}

#current-folder {
     float: left;
     color: white;
     background: rgba(0,0,0,0.2);
     padding: 0.5em 1em;
     min-width: 10em;
     border-radius: 0.2em;
     margin: 1em;
}